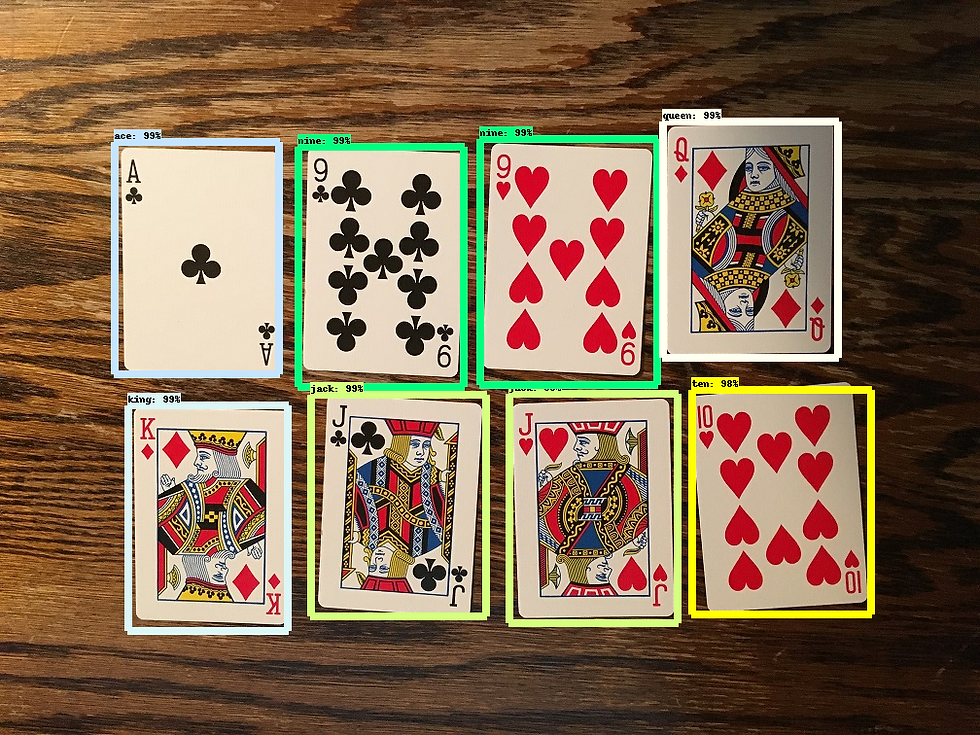
This is the article that can give you details on how you can train an object detection model using custom data and also test the trained model in Google Colab. TensorFlow-GPU allows your PC to use the video card to provide extra processing power while training, so it will be used for this tutorial. In my experience, using TensorFlow-GPU instead of regular TensorFlow reduces training time by a factor of about 8 (3 hours to train instead of 24 hours). The CPU-only version of TensorFlow can also be used for this tutorial, but it will take longer. Here I am going to use TensorFlow v1.5 and this GitHub commit (https://github.com/tensorflow/models/tree/079d67d9a0b3407e8d074a200780f3835413ef99) of the TensorFlow Object Detection API. If portions of this tutorial do not work, it may be necessary to install TensorFlow v1.5 and use this exact commit rather than the most up-to-date version.
Downloads Let’s download the software/codes required for the tutorial.
1. Anaconda
To train and get an inference model, we need an environment. We will create a virtual environment with the help of an anaconda. Download and install anaconda from here https://www.anaconda.com/products/individual
2. Models (code repository)
Download Code from git repository to train the Faster RCNN model (any object detection model having TensorFlow support) from Google.
Download the full TensorFlow object detection repository located at https://github.com/tensorflow/models by clicking the “Clone or Download” button and downloading the zip file. Open the downloaded zip file and extract the “models-master” folder directly into your own directory (c://my-projects/tensorflow1_cards) you just created. Rename “models-master” to just “models”.
Note: The TensorFlow models repository’s code (which contains the object detection API) is continuously updated by the developers. Sometimes they make changes that break functionality with old versions of TensorFlow. It is always best to use the latest version of TensorFlow and download the latest models repository. If you are not using the latest version, clone or download the commit for the version you are using as listed in the table below.
3. Trained Model
Download the trained models from the TensorFlow model zoo which are trained on the different datasets — https://github.com/tensorflow/models/blob/master/research/object_detection/g3doc/tf1_detection_zoo.md
They provide a collection of detection models pre-trained on the COCO dataset, the Kitti dataset, the Open Images dataset, the AVA v2.1 dataset the iNaturalist Species Detection Dataset and the Snapshot Serengeti Dataset. These models can be useful for out-of-the-box inference if you are interested in categories already in those datasets. They are also useful for initializing your models when training on novel datasets.
TensorFlow provides several object detection models (pre-trained classifiers with specific neural network architectures) in its model zoo. Some models (such as the SSD-MobileNet model) have an architecture that allows for faster detection but with less accuracy, while some models (such as the Faster-RCNN model) give slower detection but with more accuracy.
The only issue with the Faster RCNN is that it is slow.
4. Custom Code
Download the git repo of Edge Electronics to get labeled data and custom code to generate tf records for training and testing. https://github.com/EdjeElectronics/TensorFlow-Object-Detection-API-Tutorial-Train-Multiple-Objects-Windows-10
We will use this repo to get the labeled images and the code to generate the ground truth (TFRECORDS)
Env Setup (Local)
A. Create a virtual Environment with anaconda
# change dir to project folder to compile the protobuf files
cd C:\my_projects\exp\tensorflow1_cards# Assuming that we have downloaded everything required#create virtual environment
conda create -n cards_venv pip python=3.6

# Activate virtual environment
conda activate cards_venv

# Install tf GPU
#Since we're using Anaconda, installing tensorflow-gpu will also automatically download and install the correct
#versions of CUDA and cuDNN. You can also use the CPU-only version of TensorFow, but it will run much slower.
#If you want to use the CPU-only version, just use "tensorflow" instead of "tensorflow-gpu" in the below command.
#If you want to more faster execution then build the tensorflow from source
pip install --ignore-installed --upgrade tensorflow-gpu# install protobuf compiler
# TensorFlow Object Detection API uses Protocol Buffers, which is language-independent, platform-independent,
# and extensible mechanism for serializing structured data. It’s like XML at a smaller scale,
# but faster and simpler.
conda install -c anaconda protobuf

# other needed libraries for the API
pip install pillow
pip install lxml
pip install Cython
pip install contextlib2
pip install jupyter
pip install matplotlib

# Libraries requried to prepare the data
pip install pandas
pip install opencv-python# Configure PYTHONPATH
set PYTHONPATH=c:\my-projects\tensorflow1_cards\models;c:\my-projects\tensorflow1_cards\models\research;C:\tensorflow1\models\research\slim

# Every time the "tensorflow1" virtual
# environment is exited, the PYTHONPATH variable is reset and needs to be set up again.
# You can use "echo %PYTHONPATH%" to see if it has been set or not.
set PATH = %PATH%;%PYTHONPATH%
echo %PATH%# change dir to research folder to compile the protobuf files
cd C:\my_projects\exp\tensorflow1_cards\models\research

# If you are getting error for below command then use command below it to compile proto files
protoc --python_out=.\ .\object_detection\protos\anchor_generator.proto .\object_detection\protos\argmax_matcher.proto .\object_detection\protos\bipartite_matcher.proto .\object_detection\protos\box_coder.proto .\object_detection\protos\box_predictor.proto .\object_detection\protos\eval.proto .\object_detection\protos\faster_rcnn.proto .\object_detection\protos\faster_rcnn_box_coder.proto .\object_detection\protos\grid_anchor_generator.proto .\object_detection\protos\hyperparams.proto .\object_detection\protos\image_resizer.proto .\object_detection\protos\input_reader.proto .\object_detection\protos\losses.proto .\object_detection\protos\matcher.proto .\object_detection\protos\mean_stddev_box_coder.proto .\object_detection\protos\model.proto .\object_detection\protos\optimizer.proto .\object_detection\protos\pipeline.proto .\object_detection\protos\post_processing.proto .\object_detection\protos\preprocessor.proto .\object_detection\protos\region_similarity_calculator.proto .\object_detection\protos\square_box_coder.proto .\object_detection\protos\ssd.proto .\object_detection\protos\ssd_anchor_generator.proto .\object_detection\protos\string_int_label_map.proto .\object_detection\protos\train.proto .\object_detection\protos\keypoint_box_coder.proto .\object_detection\protos\multiscale_anchor_generator.proto .\object_detection\protos\graph_rewriter.proto .\object_detection\protos\calibration.proto .\object_detection\protos\flexible_grid_anchor_generator.proto

# If error for above command then execute this.
for /f %i in ('dir /b object_detection\protos\*.proto') do protoc object_detection\protos\%i --python_out=.# Now We are ready to build and install api
python setup.py build
python setup.py install
B. Installing Tensorflow from Source with CPU Optimizations ( to speed up the execution by 3x) Read my article (for Linux) Q.5 from it from below link to build TensorFlow from the source. Other steps will remain the same. https://www.dattatrayshinde.com/single-post/how-to-setup-tensorflow-environment-for-deep-learning Also, please refer following links if you want to build the TensorFlow from the source. In this tutorial, we are not doing it.
https://www.tensorflow.org/install/source#tested_build_configurations
https://dev.to/mayurdeshmukh10/installing-tensorflow-from-source-with-cpu-optimizations-44k8
We don’t need this right now to complete this tutorial.
Data preparation (Local)
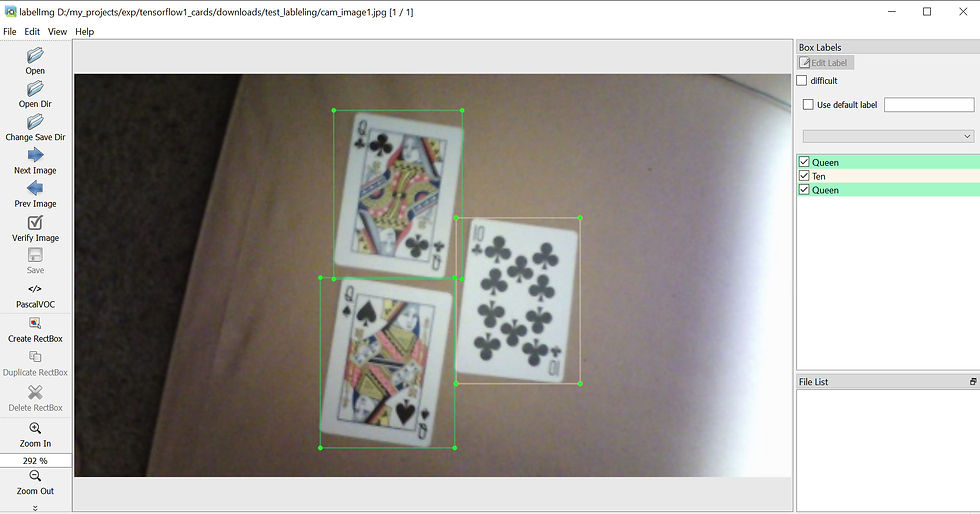
A. Image labeling with the tool To annotate images we will be using the labelImg package. If you haven’t installed the package yet, then have a look at LabelImg Installation here.
I have tried this tool locally and believe me it is very easy to use and really very helpful.

labelImg tool UI
B. Tfrecord generation
We have got already labeled files in the images folder inside C:\my_projects\exp\tensorflow1_cards\models\research\object_detection which we have copied from Edje Electronics GitHub repository. They have got the labeled files from another project. Here is the link. Around 269 images are in the train and 67 in the test folder.
#Run the below command to generate CSV from XML files to prepare data in csv format for all the training and test images
cd object_detection
python xml_to_csv.py
# now we need to generate tf_records
# TFRecord format is a simple format for storing a sequence of binary records.
# Create train data:
python generate_tfrecord.py --csv_input=images/train_labels.csv --image_dir=images/train --output_path=train.record# Create test data:
python generate_tfrecord.py --csv_input=images/test_labels.csv  --image_dir=images/test --output_path=test.record
Env Setup (Online — On Colab)
We can do the training locally on a windows machine also if you have GPU. But as google provides free GPUs/TPUs in colab environment, we will try it.
# get the tensorflow 1.x
%tensorflow_version 1.x

# In colab from runtime menu, change the runtime type to GPU and run below command
import tensorflow as tf
device_name = tf.test.gpu_device_name()
if device_name != '/device:GPU:0':
   raise SystemError('GPU device not found')
print('Found GPU at: {}'.format(device_name))
print(tf.__version__)

# mount the gdrive
from google.colab import drive
drive.mount('/content/gdrive')# change the directory
%cd '/content/gdrive/My Drive/Desktop/'

# install required libraries
!apt-get install protobuf-compiler python-pil python-lxml python-tk
!pip install Cython# compile the prtoc files
%cd /content/gdrive/My Drive/my_projects/tensorflow1_cards/models/research/
!protoc object_detection/protos/*.proto --python_out=.# set the env variables

import os
os.environ['PYTHONPATH'] += ':/content/gdrive/My Drive/my_projects/tensorflow1_cards/models/research/:/content/gdrive/My Drive//my_projects/tensorflow1_cards/models/research/slim'# for every session we need to build google object detection APIS with the help of follwing commands

!python setup.py build
!python setup.py install

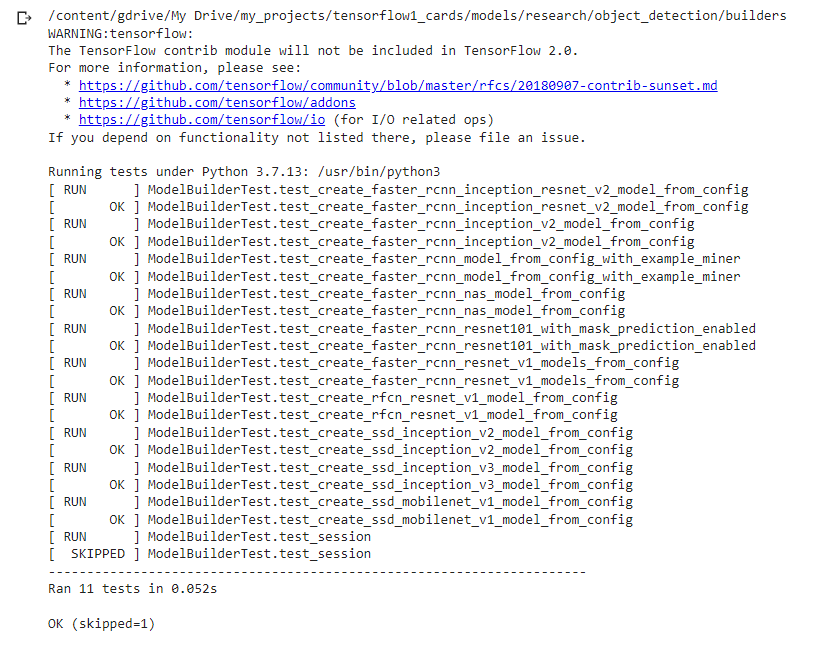
# check if the installation is proper of not. Is everything is fine?
%cd /content/gdrive/My Drive/my_projects/tensorflow1_cards/models/research/object_detection/builders/

!python model_builder_test.py# Anytime run above code to check how much time is left in colab session

import time, psutil
Start = time.time()- psutil.boot_time()
Left= 12*3600 - Start
print('Time remaining for this session is: ', Left/3600)
Before starting training of the model check the following checklist -
1. The environment should be ready

The result of the command above after testing the environment is ready or not
2. tf records should be generated
3. Labelmap should be configured properly for the classes of the objects to detect

Label Map
4. coco config files path changes should be done for the checkpoint and train-test tf records. Change the below-highlighted path along with the num_classes variable in config (should be 6 as we have 6 classes).

config
Model Training Now, Let's start training the model
%cd /content/gdrive/My Drive/my_projects/tensorflow1_cards/models/research/object_detection/

!python train.py --logtostderr --train_dir=training/ --pipeline_config_path=training/faster_rcnn_inception_v2_pets.config
Train the model for at least 60K steps and loss reach till 0.25 score.
Training LogNote — The above file has different versions with respect to the TensorFlow version.
model_main.py
model_train_tf2.py
model_tpu_main.py ( For TPU)
You need to use the training file carefully. Model Monitoring Let's monitor the model training with a tensorboard.
# Run tensorboard
%load_ext tensorboard
%tensorboard --logdir training/
Use it regularly to check loss and other evaluation matrices like mAP, etc. Tensorboard
Model Inference
1. First export the inference graph to generate frozen_inference_graph.pb
!python export_inference_graph.py --input_type image_tensor --pipeline_config_path training/faster_rcnn_inception_v2_pets.config --trained_checkpoint_prefix training/model.ckpt-XXXX --output_directory inference_graph
2. Replace the XXXX in the above command with the latest checkpoint in the training folder. e.g. 24856 if you have stopped after 24856 steps of training.
3. Use the python script Object_detection_image.py already provided in the object_detection folder to run the inference. You might need to do some changes regarding CV library import.
Result

That’s it! We have successfully created and run a custom object detection model by using google object detection API in colab. Please contact me if you have any queries or need colab notebook of code…!
References
1. TensorFlow 2 Object Detection API tutorial (tf1.x versions are also available) https://tensorflow-object-detection-api-tutorial.readthedocs.io/en/latest/training.html
2. TensorFlow 2 Object Detection — To detect cards
🎬 Video 1
🎬Video 2
3. 👉 Article I — steps to update parameters of Faster R-CNN/SSD models in TensorFlow Object Detection API
4. 👉 Neptune blog — How to Train Your Own Object Detector Using TensorFlow Object Detection API
6. 🎯 Git code Repo — Edje Electronics Github Page
Updated: Jul 24, 2021

Welcome to my blog!
If we consider different stages to create ML/deep learning models, the first most important step will be to create the environment to train the models.
Today, I just wanted to discuss the different methods available to install and use TensorFlow. Throughout my career, I have delivered most of the deep learning projects for NLP and computer vision where predominantly I have used TensorFlow for deep learning. If you are an aspiring data scientist or ML engineer, you might have come across issues while installing and using TF. My intention here is to provide the big picture of installing and using TF in different possible ways available.
I have experimented with different ways to use TF and have also gone through lots of articles about installing TF. Here, I have created a summary of all that knowledge. I have seen people or articles talking about TensorFlow installation that it's very difficult. The answer is yes and also no. Building TensorFlow from source is definitely not an easy job, but installing TensorFlow for use in your next GPU-accelerated data science project can be done in some simple ways.
Let us start!
Q.1 What is TensorFlow?
TensorFlow is an open-source software library for high-performance numerical computation. Its flexible architecture allows easy deployment of computation across a variety of platforms (CPUs, GPUs, TPUs), and from desktops to clusters of servers to mobile and edge devices.
Originally developed by researchers and engineers from the Google Brain team within Google's AI organization, it comes with strong support for machine learning and deep learning and the flexible numerical computation core is used across many other scientific domains.
Q.2 What are the different ways to use TF?
We can use the precompiled version of the TF provided by google
It can also be build from the source for the specific OS version and other dependencies like Cuda, NVidia driver, CuDNN, and tensorRT.
Q.3 Why build from source?
Following are some of the reasons because of which building TF from source is necessary.
For a normally Python package, a simple pip install -U tensorflow but, unfortunately, TensorFlow is not that much simple in some configurations of OS and dependencies. Sometimes after doing the pip install -U, errors of not founding Cuda or other dependencies will be thrown.
Sometimes we won't get the binaries for latest configuration of the OS version, CUDA version, etc.
Most importantly performance issues. Prebuit binaries might be slower than binaries optimized for the target architecture since certain instructions are not being used (e.g. AVX2, FMA). I have seen a significant amount of performance improvement with the tensorflow which is build from source, with specific dependencies like OS version, cuda version, etc.
Q.4 How to use prebuilt packages with PIP from PyPI?
1.TensorFlow with pip
For latest TensorFlow 2.x packages
tensorflow —Latest stable release with CPU and GPU support (Ubuntu and Windows)
tf-nightly —Preview build (unstable) . Ubuntu and Windows include GPU support .
Older versions of TensorFlow 1.x
For TensorFlow 1.x, CPU and GPU packages are separate:
tensorflow==1.15 —Release for CPU-only
tensorflow-gpu==1.15 —Release with GPU support (Ubuntu and Windows)
For installation of tensorflow with pip just execute following commands
Install the Python development environment on your system
Create a virtual environment (recommended)
Install the TensorFlow pip package
2.TensorFlow with conda
Follow the similar steps as mentioned in above option or the use following one liner. This is quick and dirty way to start with your project with tensorflow -
conda create --name tensorflow-22 \
    tensorflow-gpu=2.2 \
    cudatoolkit=10.1 \
    cudnn=7.6 \
    python=3.8 \
    pip=20.0
Alternatively, you can use the environment.yml file
name: null
channels:
  - conda-forge
  - defaults
dependencies:
  - cudatoolkit=10.1
  - cudnn=7.6
  - nccl=2.4
  - pip=20.0
  - python=3.8
  - tensorflow-gpu=2.2
Use environment.yml to create env insider your project.
conda env create --prefix ./env --file environment.yml --forceQ.5 How to use build TF from source?
Please follow the below article of mine to install tensorflow with following configuration -
Ubuntu 20.04
NVIDIA driver v450.57
CUDA 11.0.2 / cuDNN v8.0.2.39
GCC 9.3.0 (system default; Ubuntu 9.3.0-10ubuntu2)
TensorFlow v2.3.0
For a normally Python package, a simple pip install -U tensorflow but, unfortunately, TensorFlow is not that much simple in some configurations of hardware and dependencies. Sometimes after doing the pip install -U, errors of not founding cuda or other dependecies will be thrown.
Most of the I found that we won't get the precomplied versions of TF, with the configuration of machine I am using.
Most importantntly performance issues.
The official instructions on building TensorFlow from source are here: https://www.tensorflow.org/install/install_sources.
apt update
apt -y upgrade

sudo apt install build-essential libssl-dev libffi-dev python3-dev zip curl freeglut3-dev build-essential libx11-dev libxmu-dev libxi-dev libglu1-mesa libglu1-mesa-dev git software-properties-common librdmacm-dev
sudo apt install linux-image-extra-virtual linux-source linux-image-$(uname -r) linux-headers-$(uname -r)

wget -nc https://dl.winehq.org/wine-builds/winehq.key
sudo apt-key add winehq.key
sudo apt update
sudo apt-add-repository https://dl.winehq.org/wine-builds/ubuntu
sudo apt-add-repository main

lsmod | grep nouveau #if returns output then create below file to blacklist nouveau
sudo echo "blacklist nouveau" > /tmp/blacklist-nouveau.conf
sudo echo "options nouveau modeset=0" >> /tmp/blacklist-nouveau.conf
sudo cp /tmp/blacklist-nouveau.conf  /etc/modprobe.d/
sudo update-initramfs -u #(rebuild the kernel)#install NVIDIA drivers
sudo add-apt-repository ppa:graphics-drivers/ppa
sudo dpkg -i ./nvidia-diag-driver-local-repo-ubuntu1604-384.183_1.0-1_amd64.deb
sudo apt-key add /var/nvidia-diag-driver-local-repo-384.183/7fa2af80.pub
sudo apt-get update
sudo apt-get install cuda_drivers

#install NVIDIA CUDA toolkit
sudo cuda_9.0.176_384.81_linux-run
sudo cuda_9.0.176.{X}_linux-run # X= 1,2,3,4 ...based on how many pacthes we have#install NVIDIA CUDNN7
sudo dpkg -i libcudnn7_7.6.5.32-1+cuda9.0_amd64.deb
sudo apt-get update
sudo apt-get install libcudnn7

sudo dpkg -i libcudnn7-dev_7.6.5.32-1+cuda9.0_amd64.deb
sudo apt-get update
sudo apt-get install libcudnn7-dev

#install python
curl https://bootstrap.pypa.io/get-pip.py -o get-pip.py && sudo python3 get-pip.py
sudo pip3 install virtualenv
virtualenv --system-site-packages -p python3 $RET/venv
source $RET/venv/bin/activate

#install NVIDIA tensorrt#download required tensorrt 6.0.1.5 and untar it
tar -xvzf TensorRT-6.0.1.5.Ubuntu-16.04.x86_64-gnu.cuda-9.0.cudnn7.6.tar.gz
cd TensorRT-6.0.1.5
sudo cp -R targets/x86_64-linux-gnu/lib /usr/lib/x86_64-linux-gnu/
sudo cp -R include/include/* /usr/include/
pip install uff/uff-0.6.5-py2.py3-none-any.whl
pip install graphsurgeon/graphsurgeon-0.4.1-py2.py3-none-any.whl

#setup TF
git clone https://github.com/tensorflow/tensorflow.git
git checkout r1.14.1
chmod +x bazel-0.24.1-installer-linux-x86_64.sh
./bazel-0.24.1-installer-linux-x86_64.sh --user
bazel build --config=opt --config=cuda //tensorflow/tools/pip_package:build_pip_package
./bazel-bin/tensorflow/tools/pip_package/build_pip_package ../tensorflow_pkg
pip install ../tensorflow_pkg/tensorflow-1.14.1-cp35-cp35m-linux_x86_64.whl

#setup Project specific env
sudo apt install python3-pil python3-pil.imagetk
pip install pillow
sudo apt-get install protobuf-compiler python-lxml
Set the environment variables.
export LD_LIBRARY_PATH=$LD_LIBRARY_PATH:/etc/alternatives
export LD_LIBRARY_PATH=$LD_LIBRARY_PATH:/usr/local/cuda/lib64
export LD_LIBRARY_PATH=$LD_LIBRARY_PATH:/usr/local/cuda/extras/CUPTI/lib64
export LD_LIBRARY_PATH=$LD_LIBRARY_PATH:/usr/lib/x86_64-linux-gnu/
Q.6 How to use GPUs from a docker container?
1. Official Docker images for the machine learning framework TensorFlow
You can download official TF images as per your need and use them.
2. Build from source with Docker 19.03
Versions earlier than Docker 19.03 used to require nvidia-docker2 and the --runtime=nvidia flag. Since Docker 19.03, you need to install nvidia-container-toolkit package and then use the --gpus all flag.
3. Third Party script
Use following article to build the tensorflow from sources and create docker container.
The author has provided, compilation images for Ubuntu 18.10, Ubuntu 16.04, CentOS 7.4, and CentOS 6.6.
Just need to check the bazel version for the from Tested build configurations.
LINUX_DISTRO="ubuntu-16.04"# or LINUX_DISTRO="ubuntu-18.10"# or LINUX_DISTRO="centos-7.4"# or LINUX_DISTRO="centos-6.6"cd "tensorflow/$LINUX_DISTRO"# Set env variablesexport PYTHON_VERSION=3.6
export TF_VERSION_GIT_TAG=v1.13.1
export BAZEL_VERSION=0.19
export USE_GPU=1
export CUDA_VERSION=10.0
export CUDNN_VERSION=7.5
export NCCL_VERSION=2.4

# Build the Docker image
docker-compose build

# Start the compilation
docker-compose run tf

# You can also do:# docker-compose run tf bash# bash build.sh
I hope you like this article. Please let me know what do you think about this in the comments. Suggestions/changes are welcome to make this article more inclusive and more informative.
Happy (Deep) Learning...! 😃
References -
Compile Tensorflow on Docker https://github.com/hadim/docker-tensorflow-builder
Building TensorFlow from source (TF 2.3.0, Ubuntu 20.04) https://gist.github.com/kmhofmann/e368a2ebba05f807fa1a90b3bf9a1e03
Installing the NVIDIA driver, CUDA and cuDNN on Linux (Ubuntu 20.04) https://gist.github.com/kmhofmann/cee7c0053da8cc09d62d74a6a4c1c5e4
